| |
| "Echo
Tree Didgeridoo Mouthpiece Kits" |
|
| |
|
Step by Step Tutorial: How to Create and Attach Your Own Didgeridoo
Mouthpiece |
|
| |
|
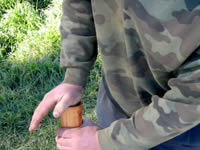
The
following tutorial will take you through a step by step workshop
aimed at giving you the skills to repair,
change and create your own high quality didgeridoo mouthpiece.
|
|
| |
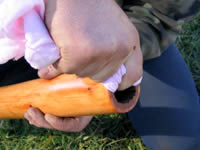
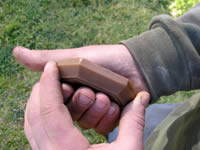
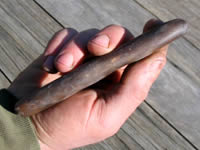
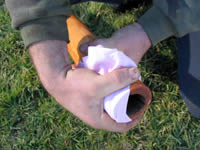
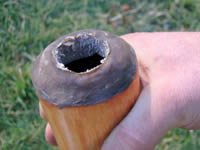
Step 1 Heating
the Ingot
This can be done with relative ease in a warm environment by simply
squeezing it in the hands until pliable, but can take a little more
effort under cooler conditions. Note: If the beeswax does melt, it
is not ruined; it just makes it more inconvenient to get the job done! |
 |
Here are a couple
of suggested methods:
1. Using natural sunlight
Place the beeswax out of the wind and in direct sunlight; like on
a window sill. Close supervision is essential as the beeswax can melt
if left too long. When the beeswax has become about as soft as plasticine,
it is ready to be shaped. |
 |
2. Using a hair dryer
On the low setting and holding the hair dryer at half to one arm's
length from the beeswax, heat as you rotate the ingot. You must be
very careful not to melt the surface of the ingot-this is why it is
best heated at a reasonable distance and constantly moved about. When
the beeswax has become about as soft as plasticine, it is ready to
be shaped. |
 |
|
| |
Step 2
Shape Ingot into a Rough Sausage
Do this by squeezing the soft ingot in your hands. If beeswax cools,
simply reheat it again. It is important to keep the beeswax at a workable
temperature, so keep your eye on this. |
 |
|
| |
Step 3 Roll
into Sausage
Find a flat surface and roll beeswax into a sausage that is about
15mm (just over ½ an inch) thick. |
 |
| Ensure
that the sausage is of even thickness throughout the length. |
 |
|
| |
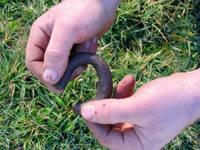
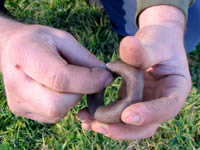
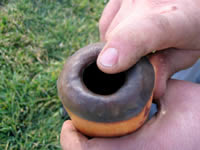
Step 4 Forming
the Donut
Ensuring that the beeswax is still nice and soft, bend sausage into
a circular shape and join the two ends so the inside diameter is about
35mm (about 1 ½ inches). |
 |
| This will produce a mouthpiece
with a diameter of around 30mm (1 ¼ inches) when the job is
complete. If you like your mouthpiece diameter to be larger or smaller
than 30mm, simply add about 5mm (1/4 inch) to the final internal diameter
you require. |
 |
Save any excess beeswax
as you will need some later for this project.
Keep in mind too that the extra you have left over after creating
your mouthpiece can be used to seal up any air leaks you may find
in your didj-now or in the future. |
 |
|
| |
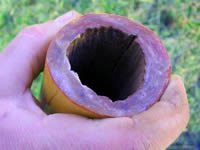
Step 5 Clean
the Didj
Using an appropriate
cleaning agent and a clean, oil free cloth, ensure all dirt and grease
is removed from the top end and inside/outside of the didj down about
25mm (1 inch). |
 |
|
| |
Step 6 'Keying'
the Beeswax onto the Didj
Take a small piece of the beeswax you have left over and making sure
it is nice and soft, smear it onto the end of the top of your didj.
The aim here is to lay down a thin, well adhered layer of beeswax
to the timber. |
 |
| This is
achieved by using firm downward pressure to push the beeswax in front
of the thumb, thereby smearing or 'keying' it onto the timber surface.
The harder the beeswax is when you are doing this, the harder it will
be on your thumb! So keep the beeswax nice and warm. |
 |
|
| |
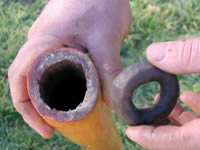
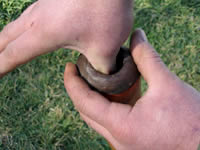
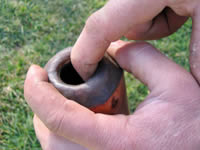
Step 7 Prepare
Didj and Donut
Make sure both the keyed beeswax on the didj end and the donut are
warm-reheat them if necessary, but be careful not to allow any surface
melting to occur. |
 |
|
| |
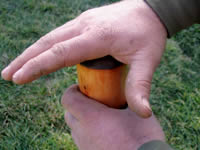
Step 8 Placement
of Donut onto Didj
Place donut onto the keyed didj end and while pushing down firmly
with the palm of your hand, very slightly twist your hand back and
forward to settle and seat the donut. Do not twist too much-the donut
itself must not physically twist against the didj end or break contact
with the surface you are mating it to. A gentle but firm 'wriggle'
is all that is needed here. |
 |
|
| |
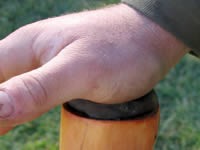
Step 9 And Now Just Making Sure!
Pushing straight down fairly hard on the attached donut will ensure
good contact. Just press down then rotate a bit and press down then
rotate a bit etc., but always directly down.
|
 |
|
| |
Step 10
'Skirting'
Keeping the beeswax warm still, shape it down to the didj's outside
edge all the way around to form a gradual curve from didj to mouthpiece. |
 |
| Using the thumb seems to
work pretty good here. |
 |
|
| |
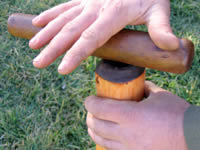
Step 11 Smoothing
Using your hand as shown and with gentle pressure, do a final smooth
over of the outside by twisting the hand and rotating the didj to
cover the whole circle. |
 |
|
| |
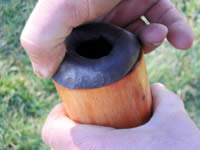
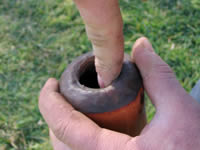
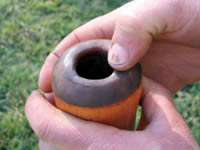
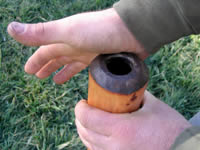
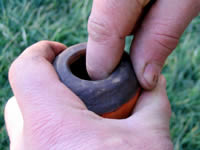
Step 12 Creating
the Internal Shape
Using the middle finger or thumb and making sure that with the other
hand you are firmly holding the donut against any pressure you create,
push the beeswax on the inside down on a gradual angle till it meets
with the internal didj wall. |
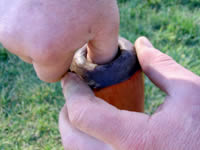 |
| Go
all the way around doing this and make sure you keep the donut secure
with your other hand the whole time as the pressure you are producing
may shift the donut if you are not firmly holding it. If this does
happen, you will need to go back to the "'Keying' the Beeswax
onto the Didj" step. |
 |
|
|
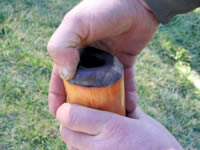
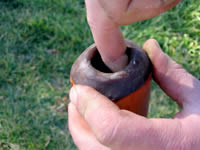
Step 13 Enlarging Internal Diameter-(If
Required)
Using an appropriately shaped, sharp knife carefully cut away any
excess beeswax from the inside to get the desired internal diameter
you want. |
 |
|
| |
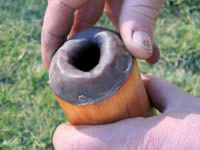
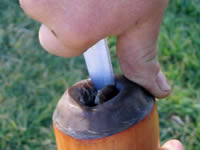
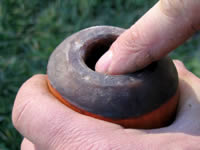
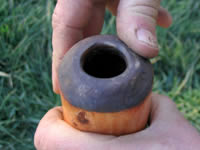
Step 14 Smoothing
the Inside
Smooth the inside with your thumb as shown using a twisting motion
while also rotating the didj. |
 |
| Make
sure that you still continue to keep the joined donut secure with
your other hand. |
 |
|
| |
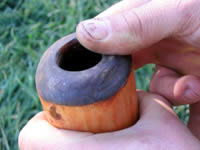
Step 15 'Rolling'
the Lip
The
lip is the very top part of the mouthpiece that will become the contact
point with your lips. Work all the way around using your finger and
sliding it back and forth over the lip and also down the inside. |
 |
| The
aim is to finish up with an even surface that allows good flow into
the didj. Remember to keep your beeswax warm! |
 |
|
| |
Step 16 Smoothing
the Inside Lip
Do a
final smooth around the lip using a straight finger as shown. Do this
by rotating the didj while twisting your finger so that you move around
the inside circle of the lip. I.e. the motion here is circular, not
back and forth. |
 |
|
| |
Step 17 General
Smooth Over
Give the mouthpiece a general
smooth over by using the palm of your hand. The motion can be back
and forth, twisting or however best suits you.
|
 |
|
| |
Step 18
Flatten
Top of Lip
This can be done with downward pressure using the thumb or by gently
rolling over it with some sort of 'rolling pin'. |
 |
| The rolling
pin will produce the most defined and even result. |
 |
|
|
Step 19
Width of the Flat Section
Make
this about 5mm to start with and if you find during playing that it
is not exactly what you want, simply reshape it at the desired width. |
 |
|
| |
Step 20 Shaping
Inside of the Flat Section
Simply run your finger around the inside
at a 45 degree angle similar to the technique used in "Smooth
Inside Lip". |
 |
|
| |
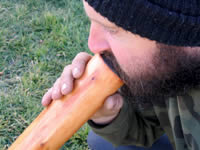
Step 21 Test
Play
If you haven't already had
a go, give your new mouthpiece a test play. See how it feels and if
there is anything you think could be changed to improve it-both sound
wise and comfort wise. |
 |
|
| |
Step 22 Final
Smoothing
The oil from your skin that is left on the beeswax after playing will
help you to do a final smooth over. |
 |
| Using your
finger/thumb/palm and whatever techniques that may feel best for you,
finish off the surface so it has no uneven spots. |
 |
|
|
| The
next section called "Manipulation Techniques" will show
you how to make further changes to the shape. |
|
|
Technique No.1 Reducing
Internal Diameter
This can be achieved by pressing the beeswax down on an angle
from the outside using the thumb. Close the diameter a bit at a time
by rotating the didj and pressing the beeswax in until you have the
desired size. |
 |
| Try to
keep the mouthpiece shape you want even by keeping your shaping even
all the way around. |
 |
|
| |
Technique No.2 Enlarging
the Internal Diameter
Simply use your finger or thumb in a twisting motion to push
out from the inside while rotating the didj to keep the enlargement
even. Once again, it is wise to use your other hand to support the
mouthpiece when you are placing it under upward or outward pressure.
Continue a bit at a time until you are happy with the new size. |
 |
|
| |
Technique No.3 Raising
the Lip
By 'pinching' the lip you can raise it up away from the didj.
While supporting the mouthpiece firmly with one hand, pinch and gently
pull up on the lip. You may need to re-flatten the lip after this
procedure. |
 |
|
| |
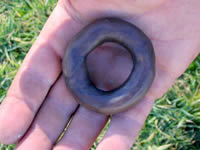
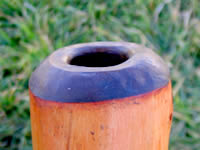
|
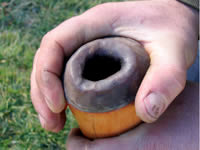
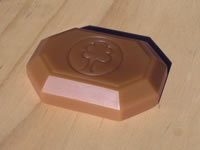
The End!
Your Final Product
It should turn out something like this! Although the colour
of the beeswax may vary a little, the shape should be close to what's
in the picture.
Over
time the beeswax will darken with use.
|
 |
I
Back
to Top I
|
| |